Alfresco QCAD Integration for CAD Files Preview

Alfresco QCAD Integration for CAD Files Preview

Alfresco is a widely used Document Management System across the manufacturing and EPC (Engineer, Procurement, Construction) industry. One of the key document types in this segment is 2D and 3D CAD files which are generated through AutoCAD and other such CAD software. Alfresco default document previewer doesn’t support these files, so the users can’t view the documents within Alfresco. However, we can integrate QCAD software with Alfresco to enable users to view these CAD files within Alfresco document viewer.

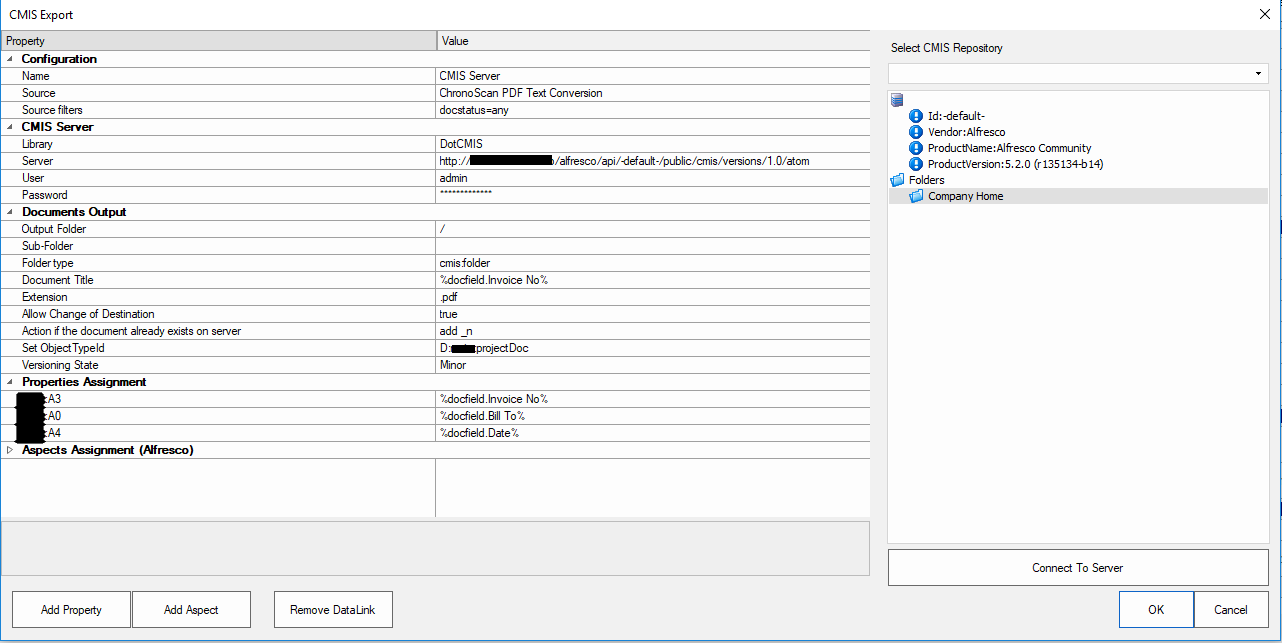
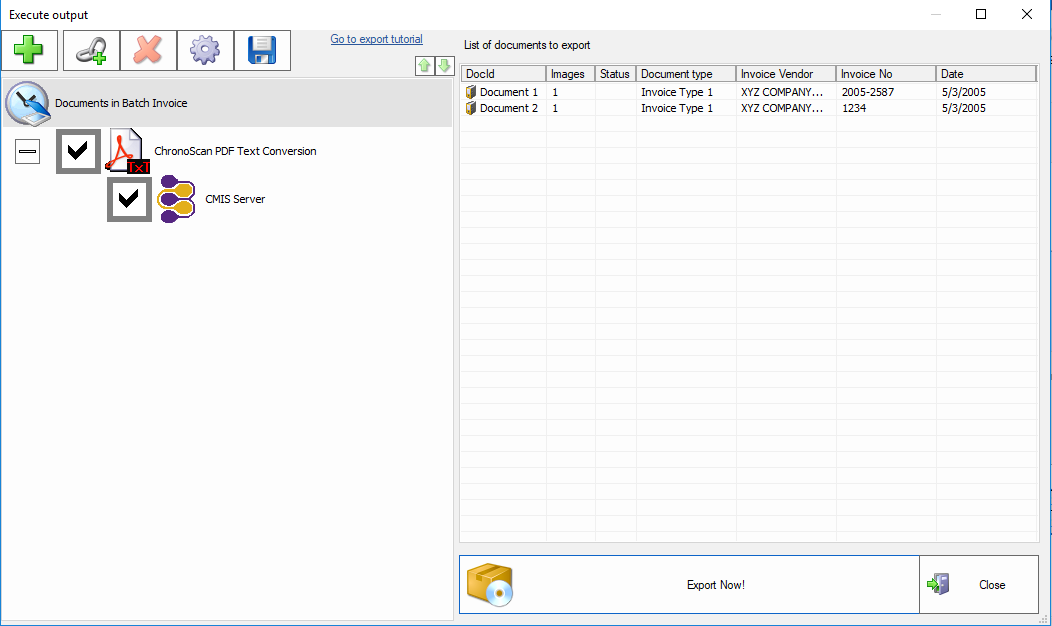
Integration Related blog: Alfresco Integration with Chronoscan

In this blog, we have provided QCAD – Alfresco integration steps in the Linux environment for the developers.

Install QCAD using the following steps. (Linux)

1. Download following file
https://www.dropbox.com/s/kwwolj6kzckysvf/qcad-3.17.3-trial-linux-x86_64.run

2. Install QCAD using the following command
Go to the path where the above file is copied.

./qcad-3.17.3-trial-linux-x86_64.run press enter

3. Copy and paste the following lines at the starting of alfresco.sh file located at /opt/alfresco-community/
(These are the environment variables which are need to be set before starting QCAD)

export QT_STYLE_OVERRIDE=""
export QT_QPA_PLATFORM=offscreen
export DISPLAY=""
export QT_QPA_FONTDIR="/usr/local/share/fonts/type1"

4. Place the following files at alfresco-community/tomcat/shared/classes/alfresco/extension/
https://www.dropbox.com/s/vhvp4ka1doym675/dwg2swf-transform-context.xml
https://www.dropbox.com/s/ns2rdh8vpl1nmhb/dxf2swf-transform-context.xml
https://www.dropbox.com/s/xaeiag05898z5pc/web-preview.get.config.xml

5. Add following in alfresco-community/tomcat/shared/classes/alfresco/extension/mimetype/mimetyps-extension-map.xml

<mimetype mimetype="image/vnd.dxf" display="DXF Mimetype">
<extension>dxf</extension>
</mimetype>
<mimetype mimetype="application/dxf" display="DXF-Mimetype">
<extension>.dxf</extension>
</mimetype>

6. Add the following at alfresco-global.properties file

# QCAD Configuration Properties #
transformer.strict.mimetype.check=false
dwg2pdf.root=/root/opt/qcad-3.17.3-trial-linux-x86_64
dwg2pdf.root=C:/Program Files/QCAD

content.transformer.dwg2pdf.priority=50
content.transformer.dwg2pdf.extensions.dwg.pdf.supported=true
content.transformer.dwg2pdf.extensions.dwg.pdf.priority=50
content.transformer.dxf2pdf.priority=50
content.transformer.dxf2pdf.extensions.dxf.pdf.supported=true
content.transformer.dxf2pdf.extensions.dxf.pdf.priority=50

7. Restart the server

8. To test the QCAD
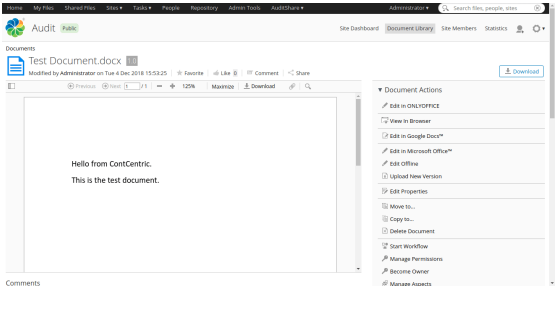
Upload the .dxf or .dwg file, they should be previewed in Alfresco.

qcad-screenshot

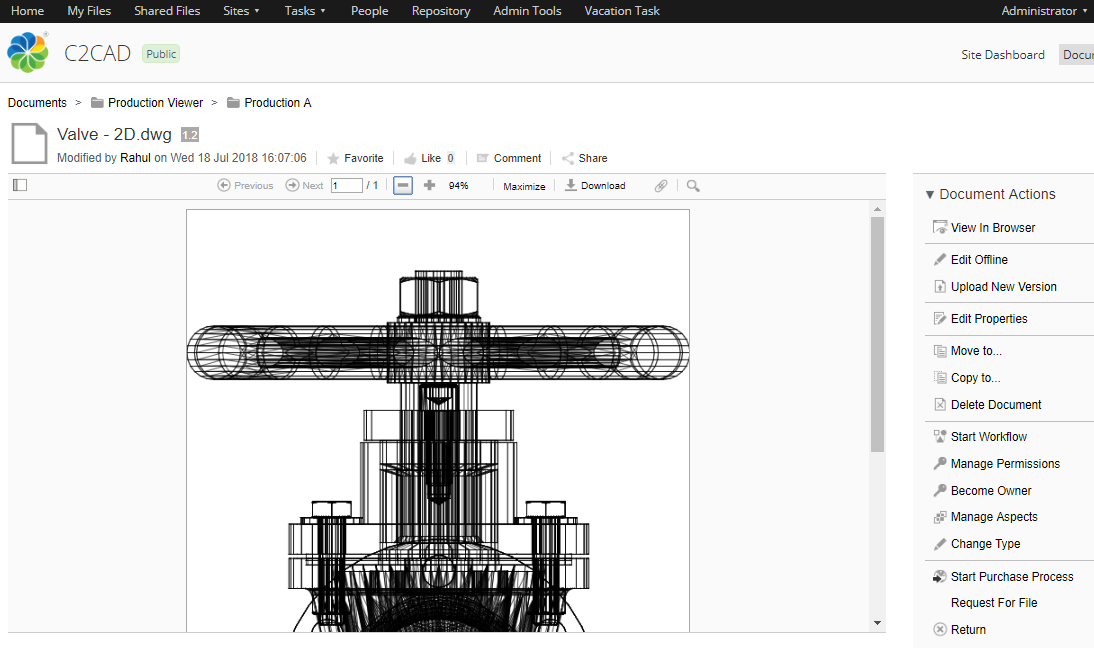
QCAD integration will support popular file extensions such as DWG, DXF, PDF, PNG, JPEG, TIF, GIF, BMP, WRL, TIF, PSD in 2D and OBJ, 3DS, STL, WRL in 3D.

As an Alfresco ECM & BPM expert, ContCentric team has been associated with several clients where Alfresco was deployed to store, govern and retrieve the CAD files. It is not essential to do the Alfresco AutoCAD integration, but the previewer would suffice. The rest of the functionality would be leveraged from the Alfresco Enterprise Content Management platform. Do contact us for the case study on this topic.

Alfresco Integration with Chronoscan

Chronoscan Introduction:
Chronoscan is a complete suite for document scanning and indexing. It allows to scan and index large sets of documents from SMEs to large enterprises.

Alfresco:
Alfresco is a web-based Enterprise Content Management and Business Process Management platform which is adopted by the enterprises world-over to capture, store, manage, retrieve and publish the documents. We at ContCentric are expert in Alfresco with all the team members with Certification from the OEM.

Integration Mechanism in Alfresco
Alfresco allows third-party applications to communicate with it using CMIS (Content Management Interoperability System)/ RESTAPIs.
Chronoscan uses CMIS to communicate with Alfresco. CMIS uses user’s credential in order to access the Alfresco repository. To know more about CMIS visit this.

The use case in this blog:
We have taken invoice as a document type to explain the scenario. Let us say we want to extract some information (like Vendor name, Invoice No, Total due amount, date) from the scanned invoices and retain them as metadata to respective documents. Once the batch of documents is ready we want to push (export) them to Alfresco repository at a specified path. So, Alfresco will have the documents with the metadata attached to it. The document library creation can be automized from the values that are extracted from the documents.

Alfresco Integration Related blog: Edit Documents Online (ONLYOFFICE Integration)

Pre-requisites
Create content type/aspect in Alfresco with the aforesaid properties. (These properties will be mapped with the fields extracted from Chronoscan). You can take a reference to the following content model.

<?xml version="1.0" encoding="UTF-8"?>
<model name="c2:contentModel" xmlns="https://www.alfresco.org/model/dictionary/1.0">

       <description>Sample Content Model for Invoice Document Type</description>
       <author>Kintu Barot</author>
       <version>1.0</version>

       <imports>
            <import uri="https://www.alfresco.org/model/dictionary/1.0" prefix="d"/>
            <import uri="https://www.alfresco.org/model/content/1.0" prefix="cm"/>
            <import uri="https://www.alfresco.org/model/system/1.0" prefix="sys"/>
       </imports>

<namespaces>
       <namespace uri="https://www.contcentric.com/model/content/1.0" prefix="c2"/>
</namespaces>

            <types>
                 <type name="c2:invoice">
                     <title>Invoices</title>
                     <parent>cm:content</parent>
                     <properties>
                                    <property name="c2:invoiceVendor">
                          <type>d:text</type>
                          <mandatory>true</mandatory>
                     </property>
                     <property name="c2:invoiceNo">
                          <type>d:text</type>
                          <mandatory>true</mandatory>
                     </property>
                     <property name="c2:invoiceAmount">
                          <type>d:text</type>
                     </property>
                     <property name="c2:invoiceDate">
                          <type>d:date</type>
                     </property>
            </properties>
        </type>
    </types>
</model>

Steps
1. Scan the invoices. (Make sure the quality of the scanned images are proper)

Chronoscan steps:
2. Create a job and batch using one of the invoices of same type. Create separate document types for invoices with a different format. Ideally, each vendor will have a unique format.
a. Create document type(s)

3
b. Add fields to the document type (which you want to extract from images)
c. Use OCR zones or Intelli-tag feature of Chronoscan in order to extract required texts.
d. Do the CMIS settings for the batch export.1
e. Process and task settings.

3. Import scanned invoices and process them in Chronoscan. (Automatic import settings is available in Chronoscan)

4. Once the invoices are processed, you will be able to see the extracted information in the grid on the right side panel. You can verify and edit if needed and then you can export them to Alfresco. However it is possible to export processed batch automatically but it is recommended to do it manually in order to verify before exporting them.

2

5. Documents will be exported to the Alfresco with the metadata attached to it.

We would be happy to discuss your requirements for digitizing the documents with proper indexing and storage in Alfresco. Do contact us for further information.

How to Add Barcode to Documents in Alfresco

When the world is heading towards digitization, a barcode is no longer a new term for the enterprises. Tracking and storing information about goods, from individual items to large stocks of millions of items, barcode has provided ease and relief to the system. Barcode allows you to accurately track large stocks and also look up any single piece of merchandise in a matter of second. There are many other cases where the barcode is applied to the documents. We, at ContCentric, have come up with the solution to add the barcode to the document stored in the Alfresco system.

Here is the technical approach on how to generate a barcode in Alfresco. If you want to explore the QR code, then please visit this link.

  1. Java action – To allow users to generate and decide where to place barcode in the document
  2. Evaluator – To show action only on PDF documents (share side class)
  3. A Java PDF library (iText) – Provides classes and functions to edit PDF documents

Related blog: Step-by-Step Guide to Add QR Code to Document in Alfresco

1.Java Action

  • Create a Java class with following code at alfresco/src/main/java
public class BarcodePdfActionExecuter extends ActionExecuterAbstractBase {
      private static Log logger = LogFactory.getLog(BarcodePdfActionExecuter.class);
      private ServiceRegistry serviceRegistry;
      public static final String PARAM_PAGE_NO = "page-no";
      public void setServiceRegistry(ServiceRegistry serviceRegistry) {
            this.serviceRegistry = serviceRegistry;
}
@Override
protected void addParameterDefinitions(List paramList) {
       for (String s : new String[] {PARAM_PAGE_NO}) {
           paramList.add(new ParameterDefinitionImpl(s, DataTypeDefinition.TEXT, true, getParamDisplayLabel(s)));
       }
}
@Override
protected void executeImpl(Action action, NodeRef actionedUponNodeRef) {
       logger.debug("Page No " + action.getParameterValue(PARAM_PAGE_NO));

       String barcodeString = "abcd0001";
    
       ContentWriter writer =
 serviceRegistry.getContentService().getWriter(actionedUponNodeRef,
           ContentModel.PROP_CONTENT, true);

       
       ContentReader reader =
serviceRegistry.getContentService().getReader(actionedUponNodeRef,
       
       ContentModel.PROP_CONTENT);
       int pageNo = Integer.parseInt((String) 
action.getParameterValue(PARAM_PAGE_NO));
       try {
       PdfReader pdfReader = new PdfReader(inputStream);
       PdfStamper stamper = new PdfStamper(pdfReader, outputStream);
       PdfContentByte over = stamper.getOverContent(1);
      
       Barcode128 barcode128 = new Barcode128();
       barcode128.setCode(barcodeString);
       barcode128.setCodeType(Barcode.CODE128);
       Image code128Image = barcode128.createImageWithBarcode(over, null, null);
       code128Image.setAbsolutePosition(10,10);
       over.addImage(code128Image);
       stamper.close();
       pdfReader.close();
} catch (ContentIOException e) {
e.printStackTrace();
} catch (IOException e) {
     e.printStackTrace();
} catch (DocumentException e) {
     e.printStackTrace();
     }
   }
}
  • Create a separate <bean> at

alfresco/src/main/amp/config/alfresco/module/${project-name}/context/ to register action class.

<bean id="barcode-pdf"
      class="com.contcentric.bar_repo.BarcodePdfActionExecuter"
      parent="action-executer">
      <property name="serviceRegistry">
           <ref bean="ServiceRegistry" />
      </property>
</bean>
  • Create an extension module at

share/src/main/amp/config/alfresco/web-extension/site-data/extensions/ in separate or existing xml file.

<config evaluator="string-compare" condition="DocLibActions">
     <actions>
          <action id="alfresco.doclib.action.barcodePdf"
              icon="barcode" type="javascript"
              label="alfresco.doclib.action.barcodePdf.label">
              <param name="function">onActionFormDialog</param>
              <param name="itemKind">action</param>
              <param name="itemId">barcode-pdf</param> <!-- Repository action id = Spring Bean id -->
              <param name="mode">create</param>
              <param name="destination">{node.nodeRef}</param>
              <param name="successMessage">alfresco.doclib.action.barcodePdf.msg.success
              </param>
              <param name="failureMessage">alfresco.doclib.action.barcodePdf.msg.failure
              </param>
              <evaluator>alfresco.barcodePdf.evaluator.checkPDFFileType
              </evaluator>
         </action>
</actions>
<actionGroups>
         <actionGroup id="document-browse">
              <action index="400" id="alfresco.doclib.action.barcodePdf" />
         </actionGroup>
         <actionGroup id="document-details">
               <action index="400" id="alfresco.doclib.action.barcodePdf" />
         </actionGroup>
    </actionGroups>
</config>
<config evaluator="string-compare" condition="barcode-pdf"> ID for the Repository Action that this form is associated with
      <forms>
      <form>
            <field-visibility>
               <show id="page-no" />
            </field-visibility>
            <appearance>
               <field id="page-no"
                      label-id="alfresco.doclib.action.barcodePdf.form.field.pageNo">
               </field>
           </appearance>
       </form>
   </forms>
</config>
  • Create a properties file for Label at

share/src/main/amp/config/alfresco/web-extension/messages/

alfresco.doclib.action.barcodePdf.label=Barcode Pdf
alfresco.doclib.action.barcodePdf.msg.success=Pdf have been barcoded.
alfresco.doclib.action.barcodePdf.msg.failure=Problem in barcoding Pdf, please contact Administrator
alfresco.doclib.action.barcodePdf.form.field.pageNo=Page Number
  • You have to add images for the action icon at

share/src/main/amp/web/components/documentlibrary/actions/

2.Evaluator

  • Create a separate <bean> with following code at

share/src/main/amp/config/alfresco/web-extension/

<bean id="alfresco.barcodePdf.evaluator.checkPDFFileType"
       parent="evaluator.doclib.action.isMimetype">
       <property name="mimetypes">
             <list>
                  <value>application/pdf</value>
             </list>
       </property>
</bean>

3. A Java PDF library (iText)

  • iText Library

Add the following dependency to pom.xml to use this library.

<!-- https://mvnrepository.com/artifact/com.itextpdf/itextpdf -->
<dependency>
    <groupId>com.itextpdf</groupId>
      <artifactId>itextpdf</artifactId>
      <version>5.0.6</version>
</dependency>

document management system

Feel free to contact us if there is any help you need while executing this code.

Edit Documents Online (ONLYOFFICE Integration)

Alfresco, the leading open source technology serving plenitude of large enterprises, helping them to manage their large chunk of documents in a structured and easily accessible system. Being an open source technology, Alfresco has vast possibilities of customization within it. Thinking from the end-users’ angle gives birth to the idea of new customization. We, at ContCentric, are always eager to provide useful tools to bridge the requirement gaps. We have been providing such customizations to Alfresco fraternity across the globe since inception.

Current Document Editing Feature:
When it comes to editing text-based documents (MS Word files at large), Out-of-The-Box Alfresco ECM provides a facility to edit the document in two ways. Either go through ‘Edit Offline’ route to check-out the documents for offline editing on the local machine, or user the ‘Edit using Google Docs’ way.

What’s New with Online Editor?
We have come up with an alternative to this in which user doesn’t need to download the document or check-out to Google Docs. The module will enable users to edit the document online and after closing it, changes will be directly reflected the document as a new version! Sounds good?

Read blog: Top 8 Reasons Why You Need Alfresco Document Management System

We need to select the option “Edit In ONLYOFFICE” given in Document Action box to edit it online as shown below.

Document management system

Test Document.docx version 1.0 has the following content.

Document management system

After selecting the Edit in ONLYOFFICE, the user will be redirected to the ONLYOFFICE window where he can easily edit the documents.

Document management system

Above are the edits done in the document online. Once a user will save it and close the document, changes will be reflected the document. The user just needs to unlock the document and open it to check it, a new version will be uploaded with all the changes.

Document management system

As you can see Version of the document is changed to 1.1 and edits are also reflected in the document.

If you want to enhance the user experience of your Alfresco DMS, please contact us for the demo and consulting!

Dynamic Workflow Creation in Alfresco

Alfresco – one of the most robust Enterprise Content Management and Business Process Management systems have been used by a plenitude of enterprises over the years. List of features and add-ons available for Alfresco has been increased exponentially over the years. We, at ContCentric, have always been contributing the best content to the Alfresco Community in the utmost possible ways.

Workflows are one of the most used functionalities of Alfresco. Almost every enterprise need wa orkflow in their ECM System. Alfresco does provide few out-of-the-box workflows which are primitive and need manual actions in initiating the same. That is the reason why enterprises need to get the automated workflows developed by programming. Developing a workflow takes a certain time and, of course, the cost of Alfresco development resources need to be hired.

With the help of our Alfresco Certified Developers, we, at ContCentric, have developed one such exceptional functionality which will allow the enterprises to assign the workflow to the documents dynamically. If our module is deployed in Alfresco, an authorized user-group can configure a linear workflow step on any folder. The reviewing and approving users are to be mapped in the order in which they want the document approval process to flow for any document in that folder.

Read the blog for: Migrate Alfresco Content and Database from Community to Enterprise

Below are the steps mentioned to configure the dynamic workflows in Alfresco.

Step 1: Deploy the dynamic workflow module to your Alfresco. We would help you configure the sites or the folders which need to be added to this functionality.

Step 2: Add the users in the authorized-users group who all would be able to configure the workflow on the folders.

Step 3: An authorized user can find the ‘Define Workflow’ action on the folder below

Alfresco development company

Step 4: Select users who will be receiving the workflow in the sequence of the approval process. The users will be populated from Alfresco users.

In this example, we have added two users in the approval process who will receive the tasks in sequence. We may keep on adding steps by adding the users. Since we assign the workflow on a folder, each folder can have a different number of steps and the approver-users!

Document management system

3

Document management system

That’s all for configuring the linear workflow!

Now let’s move to the business users who are supposed to initiate the workflows. We are carrying forward the example of 2 step approval.

Step 5: Initiator to upload a document. The workflow will be automatically triggered by the document.

The task will be assigned to the first approver user. The initiator would not be able to amend that document now as the task is with the approver.

Email Notification of the same will be sent to the approver- user’s email id.

Step-6: Action Taken by the 1st Approver.

The 1st approver will be able to see the task. He will also be able to see the preview of the document.

Document management system

Step 7: After Approval from the first user, the document will reach the second approver of the workflow.

Previous Users’ comments will be shown to every user who is performing the task.

As, we have two step workflows, after approval from the second user, the workflow will be completed successfully.

Document management system

If your business use-cases have multiple document types which have different workflows, this tool will allow you to configure as many dynamic workflows you require across the departments.

Want to explore it? Please contact us! We will be glad to show this life.

Thanks,

Publishing Management Solution Using Enterprise Content Management Tools

In the fast-evolving digital age, the day-to-day activities of the publisher is surely beyond all orthodox processes. The publishing industry is heavily being disrupted by digital media and high user expectations. Technology has evolved beyond imagination in the last decade.

The increasingly digital channels have resulted in content publishing into multiple formats. There is now a demand for real-time, cross-platform content. Consumers expect content to be more engaging, personalized, and accessible than ever before. This necessitates modern content and process technology that is scalable, flexible, and easy to work with. All this should also be in sync with the authoring processes.

Here are the highlights of a publishing management software that can change the way.

Storage and Retrieval of Content:

The organizations have diverse teams from different geographies working on the same publishing project. The stored content should be accessible to all of them irrespective of the locations with the same experience. In addition, the content may be in any of the file formats viz. doc, PDF, video, audio, or image.

The system should support them all. Our solution has the ability to design content libraries for each class or segment. The users do not have to dump the content or move them manually, but the content finds its route to the correct library as per the classification. It results in easy retrieval for the users.

Also, these libraries have metadata or document properties that help identify the content easily based on topics, authors, context, timeline, publishing channel, etc. This is applicable for both, the raw content as well as the authored content which is meant for the publication.

The retrieval of the content is made possible based on not only the sheer file name but the range of classification criteria that were applied during the storage. So, if the user requires an image file which is of Christmas celebrations at Times Square, she may apply a few keywords to get the relevant images in the result. It saves an enormous amount of time which is resulted in a faster turnaround.

Collaboration:

A publishing project involves a team of authors, reviewers, and editors to collaborate on the development. The publishing solution provides an intuitive tool for team members. The users can work on a single project irrespective of which part of the world they are in. Through an in-system document previewer, they can read, edit, comment, and tag the content. It helps to communicate the right instruction to the other users minimizing the degree of error.

Publication Workflows:

From the content authoring to publishing, there are many iterations possible. The content goes through many steps from authors, reviewers, and editors. Automated workflows in our solution enable adhering to these reviewing processes. The content reaches the right user group for their action based on the authoring process defined for the content.

These publishing process workflows can be linear, or parallel. Based on the stage of the workflow, the user rights to the content are varied so that no two users modify the content at the same time resulting in multiple copies.

For example, if an author has submitted an article for review, he or she will not be able to modify it as the permission would now be with the group of reviewers. Among the group of reviewers also, the other members would have no access when one of them would have claimed the rights of the content for the reviewing.

Leverage:

Now that the content is authored and reviewed, it is ready for publishing. It can be published to different channels which are connected, may it be digital publishing or print publishing. The existing content can be reused to shape another product as it is properly classified. The content can be versioned to use it for similar but slightly different projects. Whenever a new project is planned, the authors get a knowledge repository from which they can quickly build their work. This increased opportunity to publish more products in the same timeline.

Benefits:

Digital publishing software is beneficial for the business in many ways. Here are some of the important ones:

  • Increased quality through better authoring and proofing due to increased collaboration
  • Shortened time from idea to market resulting in more content production than before
  • Avoid duplication of efforts as the system only will be the single source of truth.
  • Help in making the strategic decision such as authoring process re-design from the analytical reports available from the system
  • Cost-saving due to the quick turn-around of a project

If you are a publishing house or a content publishing department of an organization, there are more benefits to reap from a Publishing Management Solution for sure. We would be glad to be approached to discuss the avenues of your benefit deriving from investing in a publishing solution!

You may also like to read a case study on how we streamlined processes of an IT research organization to support their journal and market-analytics data publication.

ECM & BPM – Visiting Dubai in Oct-18!

Hi,

We are glad to introduce ContCentric – an India based System Integrator and expert in Enterprise Content Management (ECM) & Business Process Management (BPM).

We are visiting Dubai on the sidelines of Gitex 2018. We would be eager to meet you in person to showcase our capabilities for your requirements. It would be great if you can give us a 30 minutes time-slot for the meeting between 12th and 21st October at Gitex or at your office location.

Please fill in the below form so that we can get in touch with you and set-up a meeting:

Error: Contact form not found.

Here are some salient points why ContCentric is an ideal solutions provider in ECM & BPM services:

  • Founded by one of the first certified Alfresco trainers and an ECM Architect of Asia Pacific.
  • The entire development team is certified on ECM & BPM technology.
  • Delivering a gamut of services in ECM & BPM i.e. consulting, development, migration, support, performance optimization and training.
  • Delivered high-quality solutions for diverse use cases such as Records Management & DMS, Accounts & Purchase Records Management, Engineering Document & Process Management, Publishing Process Management, Quality & Research Content Management.

Looking forward to meeting you in Dubai!

Visiting ECM & BPM Event-related blog: IndiaSoft 2019 Technology Event is Here- ContCentric Participates as Exhibitor

What It Takes to Migrate Alfresco Content and Database from Community 4.2 (PostgreSQL) to Enterprise 5.2 (MySQL)

The Alfresco platform has transformed the way people interact with enterprise information. Globally, companies can respond to changing business requirements and growing competition with ease, thanks to the Alfresco platform. Now, this digital business platform becomes more robust and powerful with a newer version. Now, you can update the existing Alfresco Community 4.2 to Alfresco Enterprise 5.2 and make your business more capable than ever.

Read the blog for How to Integrate Alfresco Login API With Standalone Native Android Application

Here we show how you can perform the migration from Alfresco Community 4.2 (PostgreSQL) to Alfresco Enterprise 5.2 (MySQL):

1)  Stop Alfresco 4.2 server and take a backup of PostgreSQL database in a dump file.
Steps for taking dump file:

  • Start only Postgres service in 4.2
  • Create blank file called “42dump” on desktop (without any file extension)
  • Get Alfresco DB properties from \Alfresco_Installation\tomcat\shared\classes\alfresco-global.properties file
  • Run this command: pg_dump -p 5433 -U alfresco -h localhost alfresco > “C:\Users\XXXX\Desktop\42dump”
  • Check dump file size
  • Reference: https://www.postgresql.org/docs/9.1/static/backup-dump.html

Or use pgadmin tool – https://www.pgadmin.org/download/pgadmin-4-windows/

2)  Install new Alfresco Enterprise 4.2.8 with PostgreSQL database.

3)  Copy <<ALFRESCO_HOME>>/alf_data/contentstore and <<ALFRESCO_HOME>>/alf_data/contentstore.deleted folders from directory root of old instance to new instance.

4)  Restore data in PostgreSQL database of the new instance from previously created dump file (Refer Step1)
Steps to Restore DB:

  • Start Postgres service of 4.2.8 (fresh installation)
  • Update \Alfresco_Installation_fresh\alf_data\postgresql\pg_hba.conf – Ipv4 and IPv6 – method should be “trust”
  • Get DB Properties from alfresco-global.properties file.
  •  \Alfresco_Enterprise_5.2\Alfresco_Installation_fresh\postgresql\bin>psql -h localhost -p 5432 -U postgres alfresco < “C:\Users\XXXXX\Desktop\42dump”
  • Update \Alfresco_Installation_fresh\alf_data\postgresql\pg_hba.conf – Ipv4 and IPv6 – method should be “md5”

5)  Start a new instance of Alfresco.

6)  Validate server is running and logs are error free.

7)  Install new Alfresco Enterprise 5.2 with PostgreSQL database. (Install it in the different folder than existing ACS 5.2)

8)  Validate default 5.2 and make sure it runs well with the OOTB features like document preview, download/upload etc. It is required to validate to distinguish the issues between pre-migration and post-migration.

9)  Again follow steps from 3 to 6 with the new alfresco 5.2.

10)  Verify all migrated content including metadata is present in the new instance.

11)  On User dashboard, there might be broken icons before each file name. And you won’t be able to upload the document. That is due to the licensing key is not uploaded. That step can be performed post SQL server migration.
Stop the tomcat server of the new instance.

12)  Create Alfresco user in SQL Server and Also create the alfresco database.
Connect with SQL Server:

Alfresco content migration
Enable Snapshot isolation
ALTER DATABASE alfresco SET ALLOW_SNAPSHOT_ISOLATION ON

13)  Configure the newly created database in the new instance.
Make a copy of alf_data directory(for backup purpose).
In alf_data folder, delete content, content deleted folders. Under solr4 folder, delete all 3 folders. It’s fine to delete them as Alfresco will create them after the restart.
Use this link for Solr reindexing: https://docs.alfresco.com/5.2/tasks/solr-reindex.html

14)  Place sqljdbc4-2.0.jar in tomcat\lib. Here is the link to download the jar.

15)  Make sure alfresco-global.properties of the new instance has SQL server configuration and then Start tomcat server of the new instance to let the Alfresco create a schema in the Alfresco database of SQL s

16)  After start-up, verify the logs and make sure they are error free. The schema should also be created by Alfresco in the database.
Disable all constraints and triggers of the database. Below script can be used.

17)  Select the database name before executing any script.

USE alfresco (In case DB name is different like alfresco9 – USE alfresco9)
EXEC sp_MSForEachTable 'DISABLE TRIGGER ALL ON ?'
GO
EXEC sp_MSForEachTable 'ALTER TABLE ? NOCHECK CONSTRAINT ALL'
GO

18)  Delete all rows of every table.
Select database using command –

USE alfresco
EXEC sp_MSForEachTable 'DELETE FROM ?'
GO

19)  Manually transfer each table data (rows) from the PosgreSQL database to a new instance using SQL Server Import and Export Wizard.
Create System DSN in ODBC Data Sources. Control Panel >> Administrative Tools >> ODBC Data Sources (32 Bit)
If psqlOdbc is not listed, install the driver for 32 bit.
Alfresco Content Migration

Change configuration where SQL server is installed (Do it only if import data gives conversion error).

C:\Program Files (x86)\Microsoft SQL Server\110\DTS\ProviderDescriptors\ProviderDescriptors.xml for OdbcConnection if there is column mismatch.

<dtm:ColumnSchemaAttributes
     NameColumnName = "COLUMN_NAME"
     OrdinalPositionColumnName="ORDINAL_POSITION"
     DataTypeColumnName = "TYPE_NAME"
     MaximumLengthColumnName = "LENGTH"
     NumericPrecisionColumnName = "PRECISION"
     NumericScaleColumnName = "SCALE"
     NullableColumnName="NULLABLE"
     NumberOfColumnRestrictions="4"
/>

Alfresco Document Migration


In case there is any issue in saving the design change, follow this:
Go to SQL Server management studio > Tools > Options > Expand designers > Click table and database designers > clear checkbox “Prevent saving changes that require table re-creation”

20)  Enable all constraints and triggers of the database.
Select database using the command –

USE alfresco
EXEC sp_MSForEachTable 'ALTER TABLE ? CHECK CONSTRAINT ALL'
GO
EXEC sp_MSForEachTable 'ENABLE TRIGGER ALL ON ?'
GO

21)  Copy content and content deleted folder from alf_data(4.2.8)to main(5.2) alf_data

22)  Start the server of the new instance.

23)  Verify logsagainfor error and found old contents as it was in the old instance of Alfresco.
Update Licence key through the admin console.

Well, that’s it for the said migration process!

At Concentric, we strive to address all ECM content or database migration and customization requirements with the Alfresco platform. Feel free to contact us with your business needs and we will provide you with a customized solution.

Step-by-Step Guide to Add QR Code to Document in Alfresco

The QR code is no longer a new term for techies as well as non-technical persons. Out of many possible applications of QR code, one is to apply it to the documents that have stored or associated information. For those who want a technical definition of a QR code, we can mention here what Wikipedia says: A QR code is an optical and machine-readable representation of data; here, the data describes something about the object that carries the QR code.

Alfresco, as a document management system, requires the documents to be printed with QR codes. These QR codes contain some associated data of the said documents.

We, at ContCentric, have developed a solution wherein you can directly pick the document metadata from PDF files in the form of the QR code in Alfresco.

Related Blog: How to Add Barcode to Documents in Alfresco

Here is the technical approach on how to generate a QR code in Alfresco:

  • Java action – To allow users to generate and decide where to place the QR code in the document
  • Evaluator – To show action only on PDF documents (share side class)
  • A Java PDF library (iText) – Provides classes and functions to edit PDF documents

Java Action

Create a Java class with following code at alfresco/src/main/java

public class BarcodeQRCodePdfActionExecuter extends ActionExecuterAbstractBase {
	private static Log logger = LogFactory.getLog(BarcodeQRCodePdfActionExecuter.class);
	private ServiceRegistry serviceRegistry;

	public static final String PARAM_PAGE_NO = "page-no";

	public void setServiceRegistry(ServiceRegistry serviceRegistry) {
		this.serviceRegistry = serviceRegistry;
	}

	@Override
	protected void addParameterDefinitions(List paramList) {
		for (String s : new String[] {PARAM_PAGE_NO}) {
			paramList.add(new ParameterDefinitionImpl(s, DataTypeDefinition.TEXT, true, getParamDisplayLabel(s)));
		}
	}

	@Override
	protected void executeImpl(Action action, NodeRef actionedUponNodeRef) {

		logger.debug("Page No " + action.getParameterValue(PARAM_PAGE_NO));
		
		Map<QName, Serializable> props = serviceRegistry.getNodeService().getProperties(actionedUponNodeRef);
		String qrCodeString = new String();
		for (Map.Entry<QName,Serializable> entry : props.entrySet()){ 
            qrCodeString += entry.getKey().getLocalName()+" : "+entry.getValue()+"\n";
		}
		
		ContentWriter writer = serviceRegistry.getContentService().getWriter(actionedUponNodeRef,
				ContentModel.PROP_CONTENT, true);
		ContentReader reader = serviceRegistry.getContentService().getReader(actionedUponNodeRef,
				ContentModel.PROP_CONTENT);
		int pageNo = Integer.parseInt((String) action.getParameterValue(PARAM_PAGE_NO));
		try {

			PdfReader pdfReader = new PdfReader(reader.getContentInputStream());
			PdfStamper stamper = new PdfStamper(pdfReader, writer.getContentOutputStream());
			PdfContentByte over = stamper.getOverContent(pageNo);
			BarcodeQRCode barcodeQRCode = new BarcodeQRCode(qrCodeString, 1, 1, null);
			Image qrcodeImage = barcodeQRCode.getImage();
			qrcodeImage.setAbsolutePosition(10,10);
			over.addImage(qrcodeImage);
			stamper.close();
			pdfReader.close();

		} catch (ContentIOException e) {

			e.printStackTrace();
		} catch (IOException e) {

			e.printStackTrace();
		} catch (DocumentException e) {

			e.printStackTrace();
		}
	}
}

Create a separate <bean> at alfresco/src/main/amp/config/alfresco/module/${project-name}/context/ to register action class.

	<bean id="barcodeQRCode-pdf"
		class="com.contcentric.bar_repo.BarcodeQRCodePdfActionExecuter"
		parent="action-executer">
		<property name="serviceRegistry">
			<ref bean="ServiceRegistry" />
		</property>
	</bean>

Create an extension module at share/src/main/amp/config/alfresco/web-extension/site-data/extensions/ in separate or existing xml file.

<config evaluator="string-compare" condition="DocLibActions">
	<actions>
		<action id="alfresco.doclib.action.barcodeQRCodePdf"
			icon="qrcode" type="javascript"
			label="alfresco.doclib.action.barcodeQRCodePdf.label">
			<param name="function">onActionFormDialog</param>
			<param name="itemKind">action</param>
			<param name="itemId">barcodeQRCode-pdf</param> <!-- Repository action id = Spring Bean id -->
			<param name="mode">create</param>
			<param name="destination">{node.nodeRef}</param>
			<param name="successMessage">alfresco.doclib.action.barcodeQRCodePdf.msg.success
			</param>
			<param name="failureMessage">alfresco.doclib.action.barcodeQRCodePdf.msg.failure
			</param>
			<evaluator>alfresco.barcodeQRCodePdf.evaluator.checkPDFFileType
			</evaluator>
		</action>
	</actions>

	<actionGroups>
		<actionGroup id="document-browse">
			<action index="400" id="alfresco.doclib.action.barcodeQRCodePdf" />
		</actionGroup>
		<actionGroup id="document-details">
			<action index="400" id="alfresco.doclib.action.barcodeQRCodePdf" />
		</actionGroup>
	</actionGroups>
</config>

<config evaluator="string-compare" condition="barcodeQRCode-pdf"> ID for the Repository Action that this form is associated with
	<forms>
		<form>
			<field-visibility>
				<show id="page-no" />
			</field-visibility>
			<appearance>
				<field id="page-no"
					label-id="alfresco.doclib.action.barcodeQRCodePdf.form.field.pageNo">
				</field>
			</appearance>
		</form>
	</forms>
</config>

Create a properties file for Label at share/src/main/amp/config/alfresco/web-extension/messages/

alfresco.doclib.action.barcodeQRCodePdf.label=QRCode Pdf
alfresco.doclib.action.barcodeQRCodePdf.msg.success=Pdf have been QRcoded.
alfresco.doclib.action.barcodeQRCodePdf.msg.failure=Problem in qrcoding Pdf, please contact Administrator
alfresco.doclib.action.barcodeQRCodePdf.form.field.pageNo=Page Number


Note: You have to add images for the action icon at

share/src/main/amp/web/components/documentlibrary/actions/

Evaluator (Shows action only on PDF document)

Create a separate <bean> with the following code at

share/src/main/amp/config/alfresco/web-extension/
<bean id="alfresco.barcodeQRCodePdf.evaluator.checkPDFFileType"
	parent="evaluator.doclib.action.isMimetype">
	<property name="mimetypes">
		<list>
			<value>application/pdf</value>
		</list>
	</property>
</bean>

iText Library

Add the following dependency to pom.xml to use this library.

<!-- https://mvnrepository.com/artifact/com.itextpdf/itextpdf -->
<dependency>
    <groupId>com.itextpdf</groupId>
    <artifactId>itextpdf</artifactId>
    <version>5.0.6</version>
</dependency>

12

aaaa


That’s it for now! If you have any feedback or suggestions regarding this approach, we would love to hear from you. We certainly hope that this article will guide you when you need to address QR code document management requirement in Alfresco. Though you must have come across an online barcode generator, we believe that this technique will add value to the Alfresco practice.

What’s more, as Alfresco deals with digitization projects, integration with Ephesoft helps you achieve OCR indexing, i.e. to extract values from the scanned documents and pushing it to the database. The application is widely used in Purchase Document Management and Pharmaceutical Document Management.

ContCentric team would be happy to help! Please feel free to approach us for a free consultation of the high-level requirement understanding.

Thanks for reading. Happy Developing!

    Have a Business Inquiry ?

    Let us collaborate and break yet another barrier to digitalization. Connect with us to discuss the project!


    Let us connect the digital dots!

    We are seeking dynamic professionals and unstoppable talents to craft distinct solutions for our clients to enhance their businesses. Come, join our fair & focused, optimistic & thoughtful world and deliver excellence together.

    Discipline

    Innovation

    Growth